Many dream of a perfect manicure that looks like it just came from the nail salon, but the path there begins earlier than most think. In fact, success is not decided when applying the polish but already during nail preparation. And here a crucial point is often overlooked: even the smallest moisture on the nail can cause the polish to chip faster. Those who believe the last coat of color provides shine and durability are mistaken. It is inconspicuous steps like thorough cleaning, degreasing, and the right base that determine a flawless and long-lasting manicure.
Table of contents
Quick summary
| Main point | Explanation |
| 1. Thorough nail cleaning is essential | Moisture and residues impair the durability of the polish. Nails must be thoroughly cleaned and grease-free. |
| 2. Gently push back cuticles | Remove excess cuticles to achieve a well-groomed appearance. Use gentle products for this. |
| 3. Apply thin layers of nail polish | Several thin layers improve shine and durability. Allow each layer to cure thoroughly. |
| 4. Topcoat seals and protects | A high-quality topcoat provides shine and prevents the polish from chipping. Pay attention to correct application. |
| 5. Carefully check the manicure | Check the nougellack application under different lighting conditions to correct unevenness and achieve a perfect finish. |
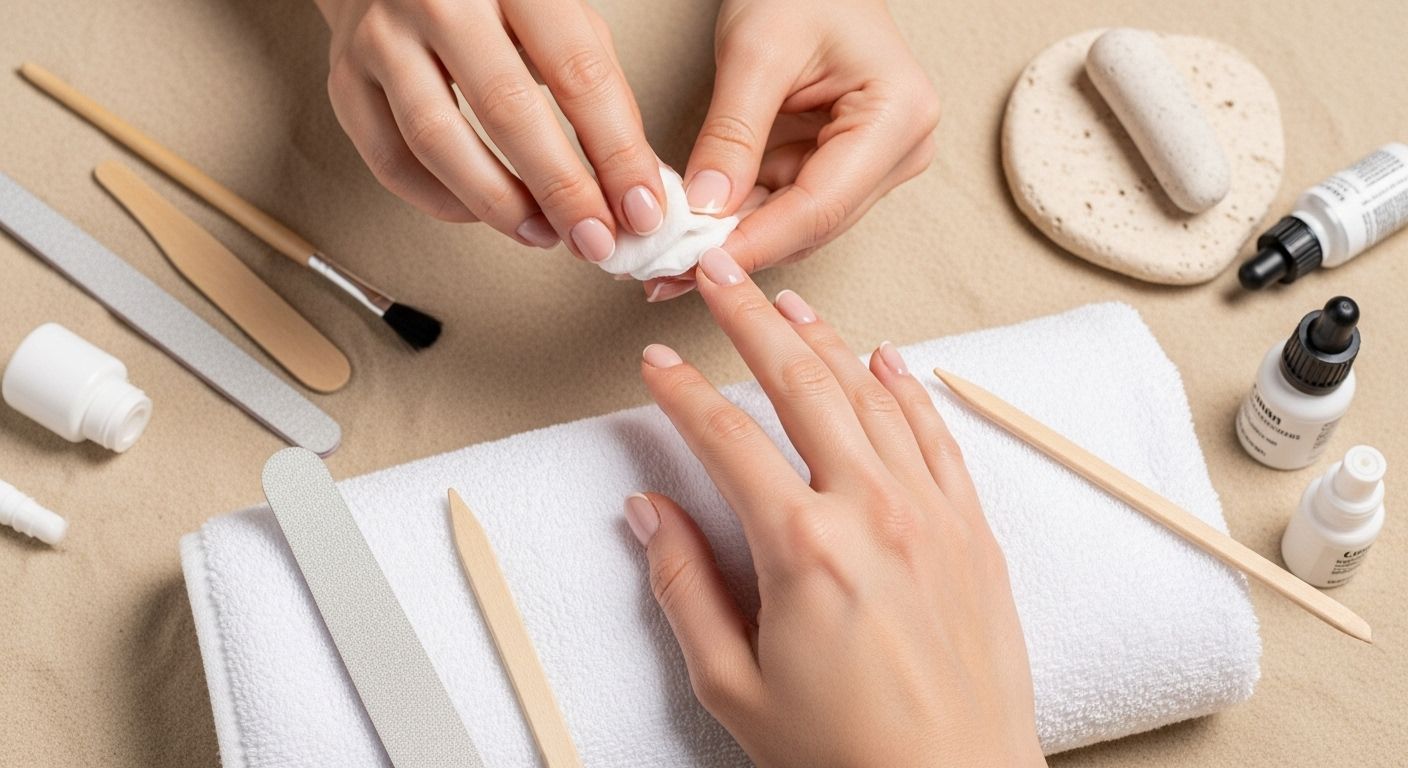
Step 1: Prepare and clean nails
A perfect manicure does not begin with applying the polish but with careful preparation of the nails. This first step is crucial for a professional and long-lasting result. Thorough cleaning and preparation ensure that the nail polish adheres optimally and does not chip prematurely.
Start with a thorough hand wash using clear water and a mild soap product. Then dry your hands and nails completely - moisture is the enemy of a perfect manicure. Use a clean, lint-free towel to remove every trace of water. Pay special attention to carefully drying the nail edges and nail beds.
Now the moment has come to degrease the nails. This is an absolutely critical step that many DIY manicure enthusiasts overlook. Take a nail polish remover without acetone and dab the nail surface with a lint-free cotton pad. This step removes oils, fats, and residues from cosmetic products that would hinder the adhesion of the polish. Perform this degreasing on each nail individually to ensure even preparation.
For an even more professional result, we recommend the Naturnagel-Reiniger und Haftvermittler, which not only cleans but also further improves polish adhesion. Apply it thinly and evenly with a precise brush.
At the end of this preparation step, your nails should be absolutely clean, dry, and grease-free – ready for the perfect polish application.
 Good preparation is the foundation for a flawless and long-lasting manicure.
Step 2: Apply nail care products
After thorough cleaning, it's time to prepare your nails for polish application with the right care products. This step is crucial for the health and beauty of your nails and provides an optimal base for your manicure.
Start with the cuticles. Soften and gently remove excess cuticles to achieve a well-groomed appearance. The Organic Melt Away Nagelpflege Cuticle Remover is perfect for this purpose. Apply the product carefully to the nail edges and let it sit briefly. Then gently push back the cuticles with a wooden stick or cuticle pusher. Warning: Cutting or aggressively pushing back can cause injuries.
Next, focus on the nail shape. Use a high-quality nail file to smooth the nail edges and achieve an even shape. Always file in one direction to avoid splintering and damage. A professional 2-in-1 nail file offers different grit sizes for optimal results.
Before painting, it is advisable to apply a base coat or base coat. This not only protects the natural nail from discoloration but also improves the adhesion of the polish. Apply the base coat thinly and evenly, starting from the nail base to the tip. Be careful not to paint over the nail edges.
One last, often overlooked step is nail care with a nail oil or nail balm. These products prevent dryness and brittleness and optimally prepare the nails for polish application. Gently massage the oil into the cuticle and nail edge.
After completing this step, your nails are perfectly prepared: cared for, shaped, and ready for a flawless polish application. Careful preparation is the key to a professional and long-lasting manicure.
Here is an overview table of the most important tools and products recommended in the article for a professional manicure.
| Tool/Product | Recommended application | Special notes |
| Lint-free towel | Completely dry hands and nails | Thoroughly remove residues and moisture |
| Acetone-free nail polish remover | Degrease nails, remove oils | Critical step before applying polish |
| Natural nail cleaner | Improve polish adhesion | Apply thinly with brush |
| Cuticle pusher/wooden stick | Gently push back cuticles | Do not use cutting tools |
| High-quality nail file | Even out nail shape and edges | Always file in one direction |
| Base coat (Base Coat) | Base for nail bed and protection against discoloration | Apply thinly, not over nail edges |
| Nail oil/nail balm | Care for nail and cuticle, prevent drying out | Massage in gently |
| UV lamp | Cure base, color, and topcoat | Adhere to exact timing |
Step 3: Apply base coat for optimal durability
The base coat is the invisible hero of every perfect manicure. It forms the crucial foundation that not only extends the durability of your nail polish but also protects your natural nails from discoloration and damage. A professional base coat is more than just an extra layer – it is your guarantee for a flawless manicure.
Start applying the base coat in a thin, even layer. The technique is important: Dip the brush only lightly into the bottle and wipe off excess product on the bottle opening. Begin with a narrow stroke in the middle of the nail and then draw gentle strokes along the nail sides. Pay special attention to sealing the nail tips and edges – these are particularly prone to chipping.
For professionals and enthusiasts, we recommend the NAILTIME 21DAYS UV Base Coat, which not only adheres excellently but also nourishes your nails additionally. Cure the base coat under the UV lamp for exactly 30-60 seconds. The precise curing time is crucial for optimal bonding.
Beware of common mistakes: Do not apply the base coat too thickly. A layer that is too thick can cause bubbling and uneven drying. It is equally important to fully cure between each layer and avoid touching the nails.
A professional tip: If you have brittle or weakened nails, an additional base coat with nail strengtheners can work wonders. Such products often contain proteins or calcium that strengthen the nail structure while serving as the perfect foundation for your polish.
After application, your nails should be smooth, shiny, and ready for the next step. A perfect base coat feels even, without bumps or clumps. It forms an invisible but sturdy bridge between your natural nail and the upcoming color application.
Step 4: Apply nail polish in several thin layers
Applying the nail polish is the moment when your manicure truly comes to life. The art lies not in a thick, but in several thin, precise layers. This step determines the brilliance, evenness, and durability of your nail polish.
Start with a steady, calm hand and a clean workspace. Wipe off excess polish from the bottle rim so that only a minimal amount remains on the brush. The trick is, less is more. Dip the brush only lightly into the bottle and remove any excess.
Start in the middle of the nail, directly at the nail base. Draw a narrow, even stroke from the root to the nail tip. Repeat this on the sides of the nail to achieve full coverage. Important: Do not touch the cuticle, otherwise the polish will look messy.
For perfect results, we recommend our 1-STEP UV POLISH Collection, which simplifies applying in multiple layers. Let each layer cure exactly 60 seconds under the UV lamp. Two ultra-thin layers produce a more brilliant result than a single thick layer.
Beware of common mistakes: Avoid layering before the previous layer is fully cured. This leads to bubbling and uneven surfaces. Between layers, use the UV lamp to perfectly seal each layer.
After application, your nail polish should appear even, without streaks or unevenness. A pro tip: Tilt your hand slightly against the light - this way you can immediately spot uneven areas. A perfect layer shines evenly and casts no shadows.
The final layer determines the shine and protection of your manicure. Make sure to apply it especially carefully and thinly. The result will delight you: salon-beautiful nails that look professional and flawless.

Step 5: Apply topcoat for extra shine
The topcoat is the crowning finish of your perfect manicure - it not only adds shine but also seals and protects your nail polish from premature peeling. A high-quality topcoat is like an invisible shield for your nails, elevating brilliance and durability to a professional level.
Start with a clean, dry brush. The topcoat should be applied thinly and evenly - if applied too thickly, it can cause bubbles or uneven spots. Dip the brush lightly into the bottle and wipe off excess at the bottle opening. This step ensures precise application.
Apply the topcoat with a gentle, flowing motion. Start in the middle of the nail and then pull along the sides and over the nail tip. Pay special attention to sealing the nail edges - this prevents chipping and extends the durability of your manicure.
For absolute professionals, we recommend the 21 DAYS UV TOP COAT Ultra Shine, which not only provides an incredible high gloss but also protects your nail polish for up to three weeks. Cure the topcoat exactly 60-90 seconds under the UV lamp - not a second too short and not too long.
A professional trick: If you want your polish to last especially long, you can apply a second, ultra-thin layer after the first topcoat. This enhances protection and shine. However, make sure to cure completely between layers.
Beware of common mistakes: Do not touch your nails immediately after application, even if they are cured. Oils and residues from your skin can affect the shine and durability. Let your nails rest briefly after application.
The result should be a flawless, shiny surface - as brilliant and professional as a nail salon finish. Your nails will not only look but also feel as if they have just been professionally treated.
Step 6: Check and correct the finished manicure
The last step of a perfect manicure is not applying polish, but careful inspection and correction. A professional manicure differs from a hobby manicure by perfection in the details. This step makes the difference between a good and an outstanding nail polish result.
Take your time to examine your nails in different lighting situations. Go into daylight, use your smartphone light, and check from various angles. Look for unevenness, streaks, or spots where the polish was not applied perfectly. Small mistakes can still be elegantly corrected at this stage.
For precise corrections, we recommend the Naturnagel-Reiniger und Haftvermittler, with which you can quickly and cleanly remove inaccuracies at the nail edge. Use a fine brush or correction pen and apply the product precisely to the areas you want to correct.
Beware of common mistakes: Avoid removing or smoothing polish with your fingernails. This leads to damage and uneven spots. Always work with professional tools and gentle movements.
Particularly important is the control of the nail edges. Polish that has been wiped over the cuticle looks unprofessional. Use a correction pen or a fine brush to precisely remove excess polish. A nail file can help smooth out minor unevenness at this stage.
A professional tip: After correction, cure your nails briefly again under the UV lamp. This seals any touch-ups and ensures an even, brilliant finish.
The result should be a flawless manicure - smooth, shiny, and professional. Each nail should be evenly and cleanly polished, without streaks, air bubbles, or color variations. Your nails are now ready to attract attention.
Here you will find a clear table of typical problems when painting, their causes, and the solutions recommended in the article.
| Problem | Cause | Recommended solution |
| Polish peels off quickly | Moisture or residue on the nail | Thoroughly clean and degrease nails |
| Bubbles in the polish | Too thick layers, incompletely cured layers | Thin layers, cure each layer |
| Polish looks uneven | Insufficient drying of layers | Fully cure between layers |
| Polish runs into the cuticle | Too much polish or imprecise application | Wipe off brush beforehand, paint carefully |
| Shine fades | Topcoat applied carelessly or too thickly | Apply topcoat thinly and evenly |
| Edges look messy | Overpainting nail edges, no correction | Use correction pen or fine brush |
| Nails chipping | Too aggressive filing, lack of nail care | High-quality file, nail oil after application |
Discover your personal path to perfect nail polish – with Nailtime
Do you dream of salon-beautiful nails that really last long and look well-groomed at the same time? You have learned in the article how important precise preparation as well as the right base and top coats are. Still, many know the problem: chips appear quickly or the perfect shine is missing. This is exactly where Nailtime offers innovative solutions that make the difference. Use our 1-STEP UV POLISH collection if you want to save maximum time and still achieve brilliant results. For even more care, find everything about Base & Top Coats in our Base & Top Coats category.

Don't wait any longer until your nails show the next flaw – discover now all products and new arrivals for your very own home salon at nailtime-shop.de. Treat yourself to exactly the UV systems that fit your daily life, your standards, and your idea of beauty. Choose professional results today, every day.
Frequently Asked Questions
How do I properly prepare my nails for polishing?
First, wash your hands thoroughly and dry your nails completely. Then degrease the nails with an acetone-free nail polish remover and, if necessary, use a natural nail cleaner to improve polish adhesion.
Why is a base coat important?
A base coat protects your natural nails from discoloration and helps the nail polish adhere better. It creates a smooth foundation that extends the durability of your manicure.
How many layers of nail polish should I apply?
It is recommended to apply several thin layers of nail polish. Two to three layers provide an even, brilliant result, while a thick layer can cause bubbling and uneven drying.
What can I do if my nail polish is bubbling?
Make sure not to apply the polish too thickly and ensure each layer is fully cured before applying the next. Excessive temperatures or direct sunlight during application can also cause bubbling.