3 in 1 nail polish: The revolution for perfectly polished nails in just one step

Do you spend too much time on your manicure? The 3 in 1 nail polish changes the way you care for your nails – it combines base coat, color polish, and top coat in just one single product.
This clever solution brings you considerable advantages: The 3 in 1 UV nail polish strengthens the nail plate and makes it more resistant to damage and breaking. It is also vegan, lasts up to 3 weeks, and provides a glossy finish. With our Nailtime 3 in 1 nail polish: "1-Step UV Polish" – a true 3 in 1 UV nail polish – you can quickly and easily create a perfect manicure without needing a base coat or top coat.
With the right technique, you can create a long-lasting manicure in just 15 minutes. In this article, you will learn why the 3 in 1 UV nail polish is the smart choice, how to apply it correctly, and which tips will keep your nails beautiful even longer.
Why 3 in 1 UV nail polish is the perfect choice
Do you know the problem with multiple products for a single manicure? Traditional UV polish application usually requires three separate steps: applying base coat, applying color polish, and finally adding a top coat. The 3 in 1 UV nail polish offers a significantly better solution:
Base, color, and topcoat in one product
The 3 in 1 UV nail polish combines three important functions in just one bottle. This clever combination includes:
-
A protective base that preserves your nails from discoloration
-
Intense color pigments for a radiant color experience
-
A sealing top coat for shine and durability
With this solution, the constant switching between different bottles is eliminated. You also no longer have to wait for individual layers to dry. This brings decisive advantages, especially for beginners or when time is limited.
The special formula strengthens your nails and makes them more resistant to damage and tearing. This protective effect is especially valuable for people with brittle or sensitive nails.
Many modern 3 in 1 UV nail polishes are vegan and free from harmful ingredients. For people with sensitive skin, there are, for example, HEMA-free variants that are more skin-friendly while still offering intense pigmentation and a long-lasting high-gloss finish.
Ordinary nail polishes often only last a few days before chipping or peeling. The 3 in 1 UV nail polish works differently: after curing under the UV lamp, it lasts significantly longer – up to three weeks. So you can enjoy your manicure much longer.
A common problem of traditional manicures is completely eliminated: the regular renewal of the top coat. With regular nail polish, you should renew the top coat at least every three days, which not only takes time but can also easily be forgotten. With the 3 in 1 system, this extra care is unnecessary.
Quick application in just one step
The 3 in 1 UV Nail Polish impresses with its easy application. You only need minimal preparation and a single bottle instead of several products one after another.
The time advantage is remarkable: With a conventional UV gel manicure, you have to apply base coat to each nail, cure it, then apply the color layer, cure again, and finally add the top coat and cure a third time. With the 3 in 1 system, two of these steps are completely eliminated.
The application is as easy as with regular nail polish. You apply the 3 in 1 UV nail polish thinly, cure it under the UV lamp, and your manicure is done. For more intense color results, you can apply a second layer – the time advantage remains enormous.
With this method, you achieve a long-lasting manicure in just about 15 minutes. This is a huge time saver compared to traditional methods, which often take 45 minutes or longer.
After curing under the lamp, most 3 in 1 UV nail polishes form a so-called tacky layer. You simply remove this with a cleaner and a cellulose cloth. This brings out the sealed shine perfectly.
Removal is also uncomplicated. Unlike some permanent gel systems, the 3 in 1 UV nail polish can be removed relatively easily with an acetone-based remover. This way, you can change your nail color anytime.
The simple application process also makes this system especially suitable for beginners. You don't need complicated techniques for professional-looking results. Even with little practice, you can achieve flawless manicures.
The 3 in 1 UV nail polish is perfect for on the go. Instead of having to carry several bottles, a single product plus a UV lamp is enough for spontaneous manicures. This makes it the ideal companion for travel or people with limited storage space.
Discover the 3 in 1 UV Nail Polishes from Nailtime - the 1-Step UV Polish products and experience for yourself how easy a professional manicure can be!
Nailtime 3 in 1 UV Nail Polish at a Glance
The Nailtime 1-Step series stands out among the various 3 in 1 UV nail polishes on the market. These products perfectly implement the innovative 3in1 technology and offer impressive quality for your nail care at home.
The Nailtime 1-Step UV nail polish combines base, color, and top coat in a single layer. The special feature: it cures in seconds under the LED lamp and becomes hard and dry immediately. The annoying waiting time that can cause smudges with conventional nail polishes is completely eliminated.
The longevity is especially convincing: customers report that the polish neither chips nor loses its brilliant shine even after four weeks of wear. The nail naturally grows out during this time, but the quality of the polish remains – a true long-term talent for consistently beautiful and strong nails.
The Nailtime 1-STEP UV Shellac provides perfectly shiny nails in seconds. The special formulation guarantees radiant results without long waiting times and without compromising on quality.
For beginners, Nailtime offers practical starter sets. These contain, besides selected colors, all necessary utensils and a professional LED-UV device. This way, you have everything you need for your manicure from the start.
The color selection at Nailtime is diverse and ranges from subtle nude tones to vibrant neon colors. For every occasion and mood, you will find the right shade. The intense pigmentation ensures bright color results even with a thin layer.
The durability differs significantly: while normal nail polishes often chip after just a few days, UV nail polish lasts about a week. With the special UV curing, this durability extends up to four weeks. The difference is remarkable.
For busy nail design fans, the 3 in 1 UV nail polish is the perfect solution. The express manicure with the Nailtime system allows you to achieve professional results in a fraction of the time. Especially practical is that no additional products like base or top coat are needed.
Compared to conventional 2-in-1 products, the advantage becomes even clearer. Traditional 2-in-1 base and top coats for classic nail polishes can extend the durability of a normal manicure up to 7 days but do not come close to the longevity of a 3 in 1 UV system.
After curing, the Nailtime polish not only looks professional but also remains flexible. This flexibility prevents the polish from chipping or cracking immediately from minor bumps. As a result, your manicure stays flawless longer even with an active lifestyle.
The application of the Nailtime 3 in 1 UV nail polish is done in a few simple steps:
-
First, prepare your nails and degrease them thoroughly
-
Next, apply a thin layer of the 3 in 1 polish to the nail edge without touching the cuticle
-
Then cure the polish under the lamp
-
If needed, repeat steps 2 and 3 for more opacity
-
Finally, remove the tacky layer with a cleaner, which really brings out the shine
The entire process is simple and requires no special prior knowledge. Even beginners can achieve professional results immediately with Nailtime 3 in 1 UV nail polish.
The 3 in 1 UV nail polish is a cost-effective alternative to salon visits. The purchase cost of the starter set quickly pays off with regular manicures. Plus, you save not only money but also the time for appointments and travel to the nail studio.
Step-by-step guide for perfect nails
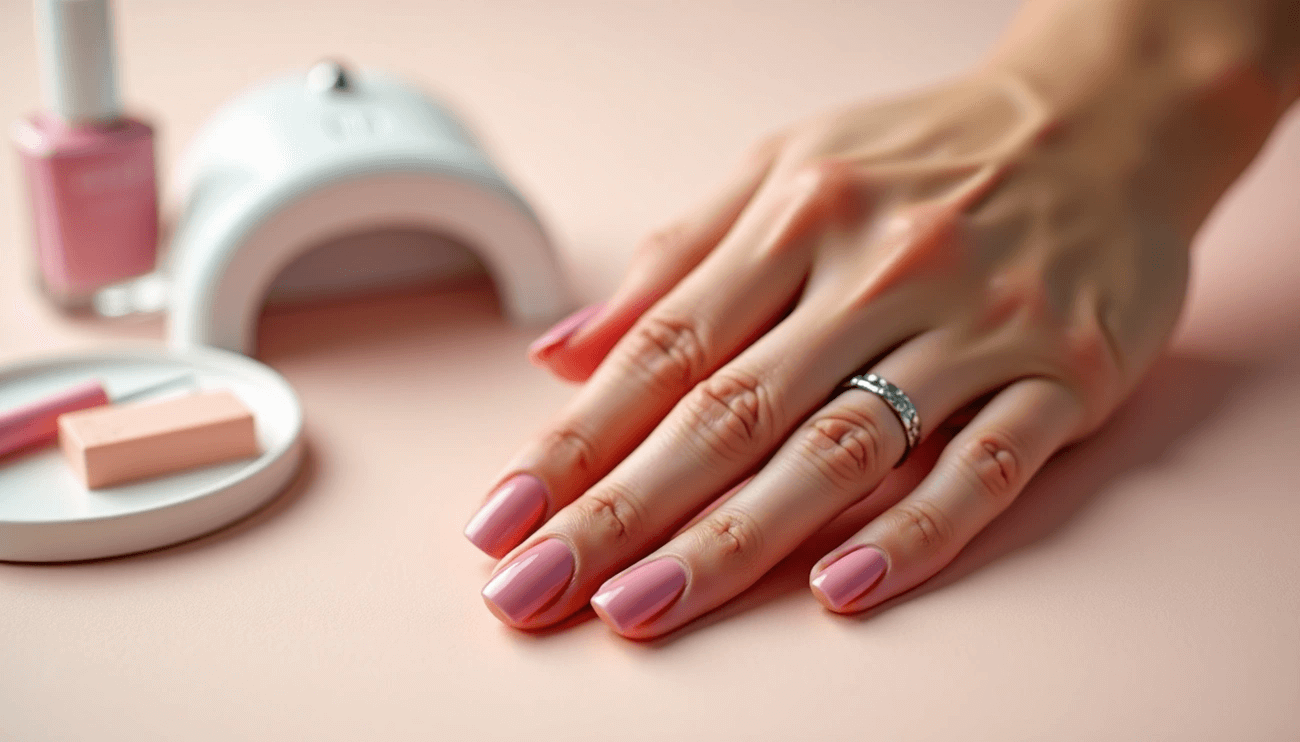
A long-lasting manicure with 3 in 1 UV nail polish starts with the right preparation. With the right technique, you create beautifully stunning nails – all without a salon visit.
Prepare and degrease nails
Careful nail preparation is the foundation for a professional manicure with 3 in 1 UV nail polish. This crucial first step largely determines the durability of your result.
Always start with clean, dry hands. Clean them thoroughly and file your nails into the desired shape. Make sure to file in one direction only to avoid splitting.
Gently push back the cuticle with a rosewood stick. Only remove the invisible cuticle on the nail plate – this thin layer must be completely gone for your 3 in 1 UV nail polish to adhere optimally.
Important: Mattifying the nail plate is crucial for durability. Use a buffer with fine grit to gently roughen the nail surface without pressure. This removes shine and creates perfect adhesion for the polish.
Apply thinly – here’s how to do it right
After thorough preparation, apply the 3 in 1 UV nail polish. Here the great advantage of the product becomes clear – you only need one product instead of three separate layers.
The golden rule when applying: Thin is key. Always apply the 3 in 1 UV nail polish in very thin layers. A layer that is too thick leads to uneven curing and premature chipping.
The perfect technique is done in three precise brush strokes:
-
Start in the middle of the nail and pull towards the tip
-
Stroke from the left side of the center to the tip
-
Guide the brush from the right of the center towards the tip
Make sure to apply the nail polish up to the nail edge without touching the cuticle. This careful sealing of the free nail edge significantly extends durability.
Shake the bottle only lightly before use – shaking too hard creates air bubbles that become visible later.
If needed, you can apply a second thin layer. Important: Let the first layer cure completely under the lamp before applying the next.
Pro tip: After applying, lightly run the brush once more over the upper nail edge. This sealing prevents premature chipping.
Curing with UV/LED lamp
Curing under the UV or LED lamp is crucial for the durability and shine of your manicure. The correct curing time varies depending on the lamp type and manufacturer:
-
LED lamp: 30-60 seconds per layer
-
UV lamp: 60-120 seconds per layer
Be sure to follow the recommended curing times. Too short curing leads to poor durability, too long can overheat the nail plate and unnecessarily expose your hands to UV light.
Make sure the light shines evenly on all nails. It is best to cure the thumbs individually, as they often react more sensitively.
After the final curing, it is recommended to hold the entire hand under the lamp again for 60 seconds. This fully cures the 3 in 1 UV nail polish.
Cleaning the tacky layer
After curing, a moist, sticky layer remains on the nails – the so-called tacky layer. You remove this completely after the final curing so that the true shine comes through.
This is how you properly remove the tacky layer:
-
Soak a lint-free pad with cleaner
-
Gently wipe over each nail
-
Remove the sticky layer completely
The NAIL CLEANER is perfect for this step. Alternatively, you can also use nail polish remover without nourishing oils.
Note: Only remove the tacky layer after the final curing. In intermediate steps, it remains as an adhesion promoter for further layers on the nail.
After removing the tacky layer, your manicure gets a brilliant shine and looks like it just came from the salon.
Optional: nail oil for extra shine
The final, optional step is the application of nail oil. Although not absolutely necessary, it gives your manicure extra shine and cares for the cuticles.
With this professional preparation and application, you create a flawless and long-lasting base for your nail design.
Tips, colors & care for your home nail studio
With the right technique and care, you turn your 3 in 1 UV nail polish manicure into a long-lasting work of art. The secret lies not only in the application but also in avoiding mistakes and proper care. Here you will learn how to perfect your home studio.
Avoid mistakes: Prevent bubbles and cracks
Do you know the problem: freshly painted nails that suddenly show bubbles or cracks? These annoyances can be avoided with simple tricks.
The most common cause of annoying bubbles is shaking the nail polish bottle incorrectly. Vigorous shaking creates air bubbles in the polish that later become visible on the nail. Instead, gently roll your 3 in 1 UV nail polish between your palms or move it lightly back and forth. This way you mix the ingredients optimally without creating disturbing air bubbles.
High room temperatures can also cause problems. Nail polishes do not tolerate heat very well. A heated apartment with temperatures around 30 degrees can cause the nail polish to "boil" and create bubbles. Store your 3 in 1 UV nail polish in a cool, dark place – the refrigerator is excellent for this in summer.
Oily care products are another common disruptor. If you have applied hand cream before painting, the 3 in 1 UV nail polish cannot adhere optimally. Therefore, always thoroughly degrease your nails before application.
The biggest enemy of long-lasting manicures, however, is incorrect application: "The root of the problem: Chipping nail polish is usually due to poor preparation or incorrect technique. Layers that are too thick, air in the polish from shaking too vigorously, or curing times that are too short – all of these can promote unwanted chipping."
How to successfully avoid bubbles and cracks:
-
Always apply the 3 in 1 UV nail polish in ultra-thin layers – "Thin is key: Apply the nail polish in ultra-thin layers. This way it dries faster and more evenly, and the risk of chipping is drastically reduced."
-
Give each layer enough time to cure under the UV lamp
-
Pay attention to the correct curing time – too short won't cure properly, too long can dry out the nail plate
-
"Wait briefly after applying each layer before placing your hand under the lamp. This allows air bubbles to escape more easily."
-
Use high-quality products like the Nailtime 3 in 1 UV nail polish
A crucial point is sealing the nail edge. After applying the 3 in 1 UV nail polish, lightly brush over the top edge of the nail with the brush once more. This little trick prevents premature chipping.
Too little time under the UV lamp can have fatal consequences: "Are you unsure how long a product should cure under the UV lamp? Find out, because the curing time depends, among other things, on the type of product (base, gel, top) and the lamp's power. Even if the hairstyle looks finished at first glance, it will peel and/or chip if the product was only superficially cured."
With a 3 in 1 UV nail polish like the Nailtime 1-Step, the complexity of three different products is eliminated, but you should still pay attention to the recommended curing time.
Discover the 3 in 1 UV nail polishes from Nailtime - the 1-Step UV Polish products offer an enormous variety of colors for every taste!
The color layer of a 3 in 1 UV nail polish remains flexible after curing. This flexibility prevents the polish from cracking or chipping immediately from small impacts. As a result, your colored manicure stays flawless longer, even with an active lifestyle.
The right color choice also depends on your skin tone. Warm skin tones harmonize especially well with colors like orange, coral, or gold, while cooler skin tones suit blue, pink, or silver shades better. Feel free to experiment with different colors – with the 3 in 1 UV nail polish, you can fully express your creativity.
Nailtime starter sets for beginners
Getting started with the world of 3 in 1 UV nail polishes becomes child's play with the practical Nailtime starter sets. These sets contain everything you need for your first steps in your home nail studio.
The great advantage of a starter set: You receive all the necessary products and tools in one package and don't have to search for everything individually. The included products are perfectly coordinated, guaranteeing you optimal results from the start.
If you want to expand your color range, simply buy individual colors of the Nailtime 3 in 1 UV nail polish after the first set.
With the starter set from Nailtime, you not only get high-quality products but also a professional result like from the nail salon – at a fraction of the price. The investment pays off after just a few uses compared to regular salon visits.
How to gently remove UV nail polish
After about two to three weeks, it's time to remove the 3 in 1 UV nail polish. The right technique is crucial for the health of your nails.
The gentlest method is with an acetone-based remover: "The removal of UV nail polish with acetone is probably the most popular technique, used by both professionals and amateurs."
For the gentle removal of the Nailtime 3 in 1 UV nail polish you need:
-
Acetone-based nail polish remover or special UV polish remover
-
Wipes or lint-free cotton pads
-
Aluminum foil cut into small pieces
-
A file for roughening
-
A cuticle pusher
Here is how you proceed step by step:
First gently roughen the top coat: "Roughen the top coat with a nail file." This step is essential so the remover can work better. "First, we roughen the top coat with a buffer. This process should be done gently but long enough until the color layer is really roughened. Always move the buffer towards the nail tip."
Then soak the wipes or cotton pads with remover: "Then dip the Semilac Remover Wraps or lint-free wipes in acetone or Semilac remover." Important: "Preferably use wipes, as fluffy cotton pads can get caught in the roughened polish. Also important is a
Conclusion
The 3 in 1 UV nail polish changes the way you care for and beautify your nails. With the Nailtime 1-Step UV nail polish, you achieve a professional manicure in just 15 minutes – a real time saver for your everyday life.
The application is incredibly simple: prepare nails, apply polish thinly, cure, and remove the tacky layer – done! This simplified technique makes nail design at home child's play, whether you are a beginner or already experienced.
The 3 in 1 UV nail polish from Nailtime gives you the opportunity to express your creativity and try out different colors. The practical starter sets offer everything you need for the perfect start.
With the right technique, you can transform your hands into real eye-catchers in no time. You get a professional manicure like from the nail salon – conveniently at home and at a fraction of the cost.
Key Takeaways
The 3 in 1 UV nail polish revolutionizes nail care by combining base coat, color polish, and top coat in a single product – perfect for anyone who wants to save time and still achieve professional results.
• Pure time saver: A complete manicure is done in just 15 minutes instead of the usual 45 minutes
• Long-lasting results: Up to 3 weeks of perfect nails without chipping or loss of shine
• Easy application: Apply thinly, cure under UV lamp, remove tacky layer – done!
• Nail strengthening included: The special formula makes nails more resistant to damage
• Cost-effective: Replaces three separate products and quickly pays off compared to salon visits
With Nailtime 3 in 1 UV nail polish, you turn your home into a professional nail studio. The vegan formula offers intense pigmentation and brilliant shine – ideal for beginners and professionals alike.
FAQs
Q1. How long does the 3 in 1 UV nail polish last? The 3 in 1 UV nail polish usually lasts up to 3 weeks without chipping or losing its shine. However, the exact durability can vary depending on application and care.
Q2. Is the 3 in 1 UV nail polish easy to apply? Yes, the application is very easy. Apply the polish thinly, cure it under a UV or LED lamp, and remove the tacky layer. If needed, you can apply a second thin layer.
Q3. What advantages does the 3 in 1 UV nail polish offer compared to conventional nail polish? The 3 in 1 UV nail polish combines base coat, color polish, and top coat in one product, saves time during application, lasts longer, and strengthens the nails. It also provides a brilliant shine and intense colors.
Q4. How do I gently remove the 3 in 1 UV nail polish? First, gently roughen the top layer. Then soak cotton pads with nail polish remover, wrap them in aluminum foil around the nails, and let them sit. Afterwards, you can carefully remove the polish.
Q5. Is the 3 in 1 UV nail polish suitable for beginners? Absolutely! The 3 in 1 UV nail polish is especially beginner-friendly as it simplifies application. With a bit of practice, even beginners can quickly achieve professional results. Starter sets also provide everything needed to get started.